

Okay, okay, fine. The most wanted tutorial. I’ll share with you how I used my Cricut machine to address my wedding invitations envelopes! This not only saved me a lot of time but money too. Paying someone to address envelopes can get expensive depending on how many guests you have. I just knew this was an area of the wedding I could save money on while still making them look pretty.
So thank you Cricut for being the real MVP of my wedding. And if you want to sponsor my wedding please don’t hesitate on contacting me 😉
Okay, now let’s get into the process (the real reason why people are on my blog)
MATERIALS AND FONTS:
- Script Font (Name)
- Serif font (Address)
STEP BY STEP PROCESS:
STEP 1:
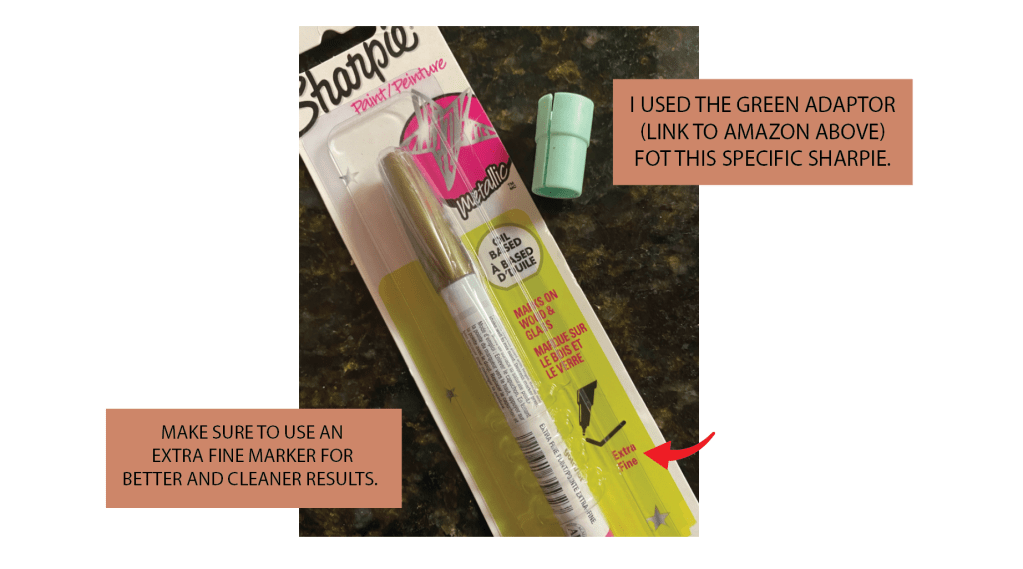
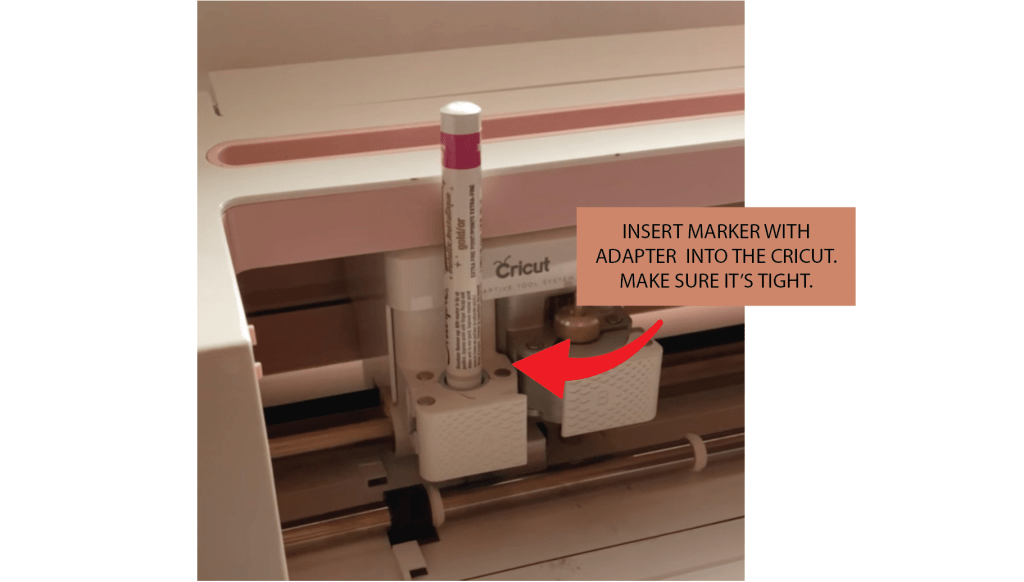
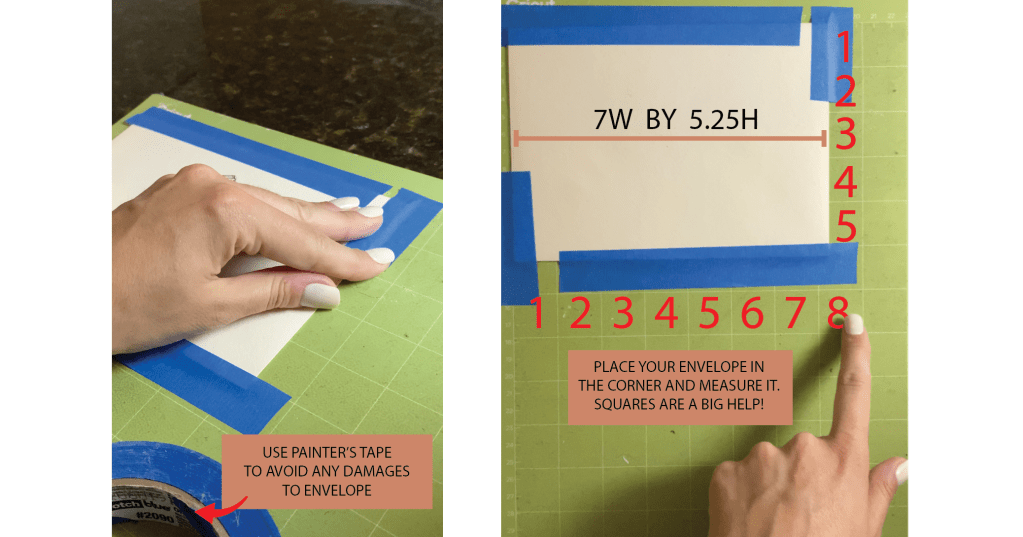
Replace the Cricut pen adapter with the adapter that you need (I used the green for this sharpie specifically). Test your pen before to make sure it works fine. Insert the pen in the adapter and close it, making sure it is tight. Measure your envelope on the Cricut mat. This is so helpful to do in order to figure out where to place your art later on.
STEP 2:
Tape your envelope to the mat using painter’s tape (to avoid any damage to the envelope this is the best tape). I like to position it on the left top corner. For me and my perfectionist self I did only one envelope at a time. That way I just avoided making any silly mistake.
STEP 3:
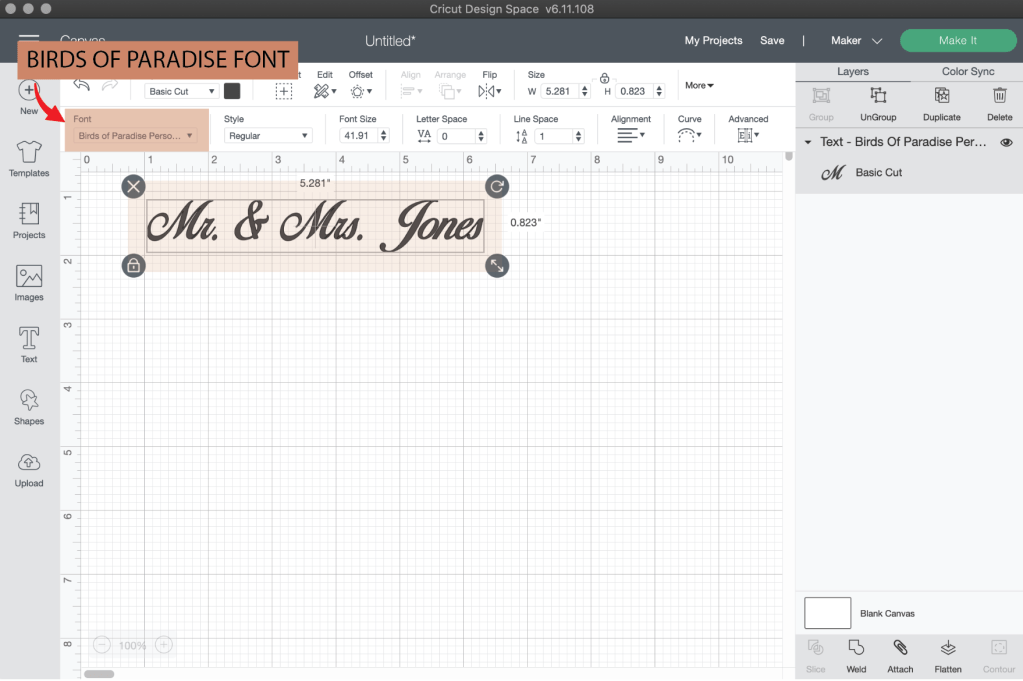
Now let’s work on the computer steps. Once you have your Cricut app open, create a new file. I am a graphic designer, so as part of my job I download and buy fonts all the time. MyFonts and Dafont are my favorite websites to find them. In this case I got Ballantines Serial from MyFonts for all the names. Once you download the font it should appear as an option under the fonts tab on the Cricut app. For the address I used Georgia. If the font does not appear, you might need to quit Cricut and open it again.

Step 4:
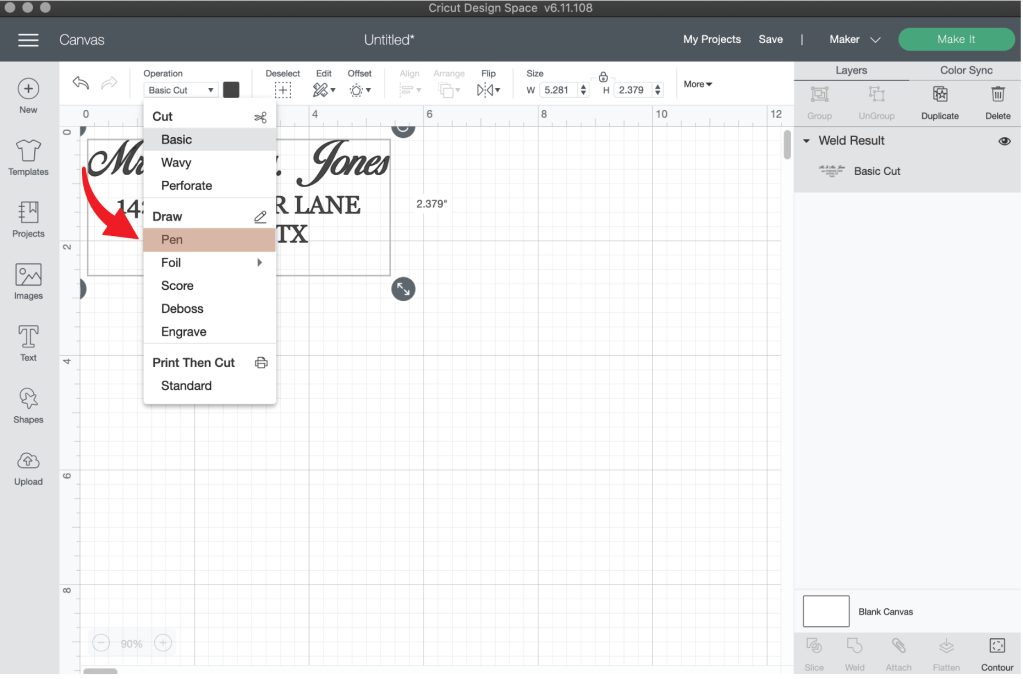
Type in your information. Center it. I personally like the address to be all caps. It makes it cleaner and easier to read in my opinion. Once you have it centered, group it if you are using two different text boxes with different fonts. Then weld it together. On the operations options, select Pen (under Draw).


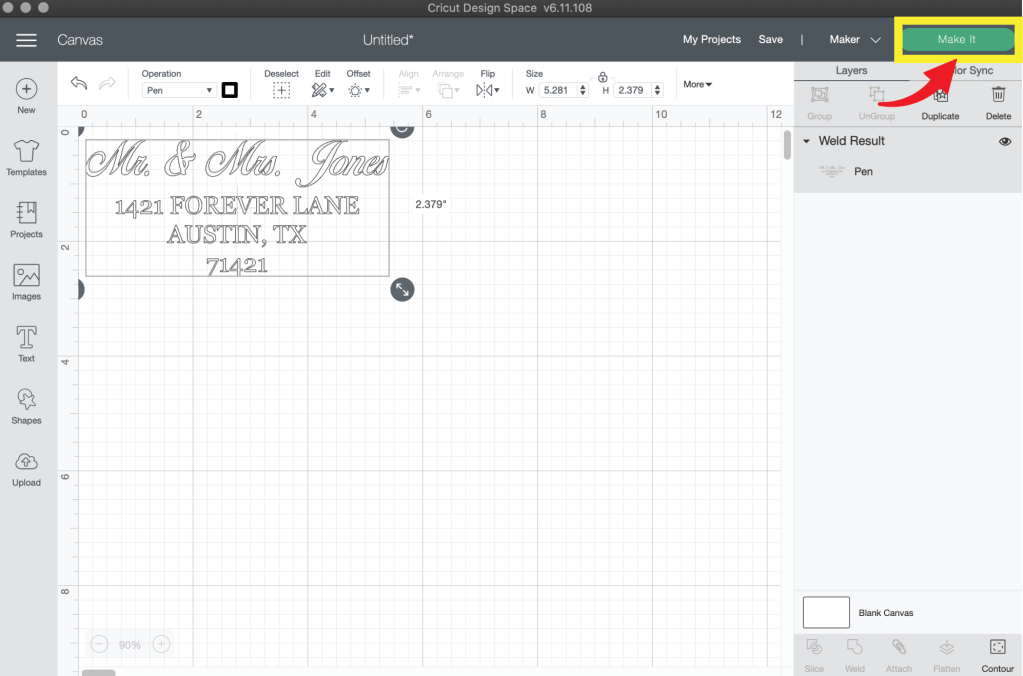
Step 5:
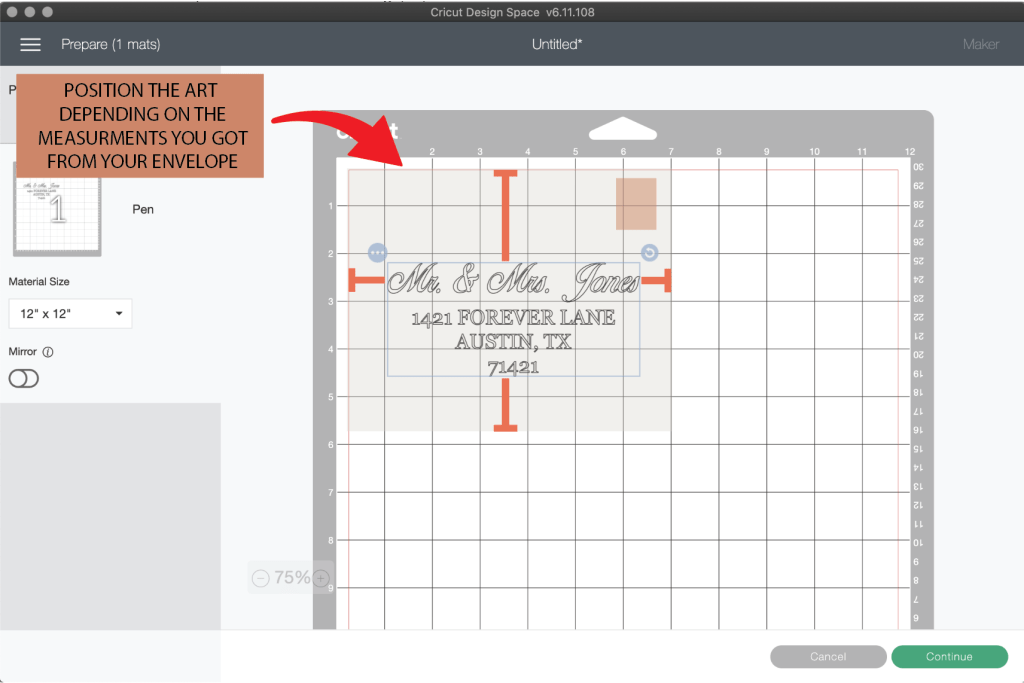
Now you are ready to (almost) see the magic happen! Click Make it. Here is the tricky part. Making sure you position the art in the right place. So it’s centered on the envelope. That is why measuring at the beginning is so important. I usually try to center it horizontally and then have a larger space on the top to leave space for stamps. After a while you will just know where to place them. By invitation 50 I could basically do it without really looking at it. Once you feel confident on where you placed it, it is ready to go!
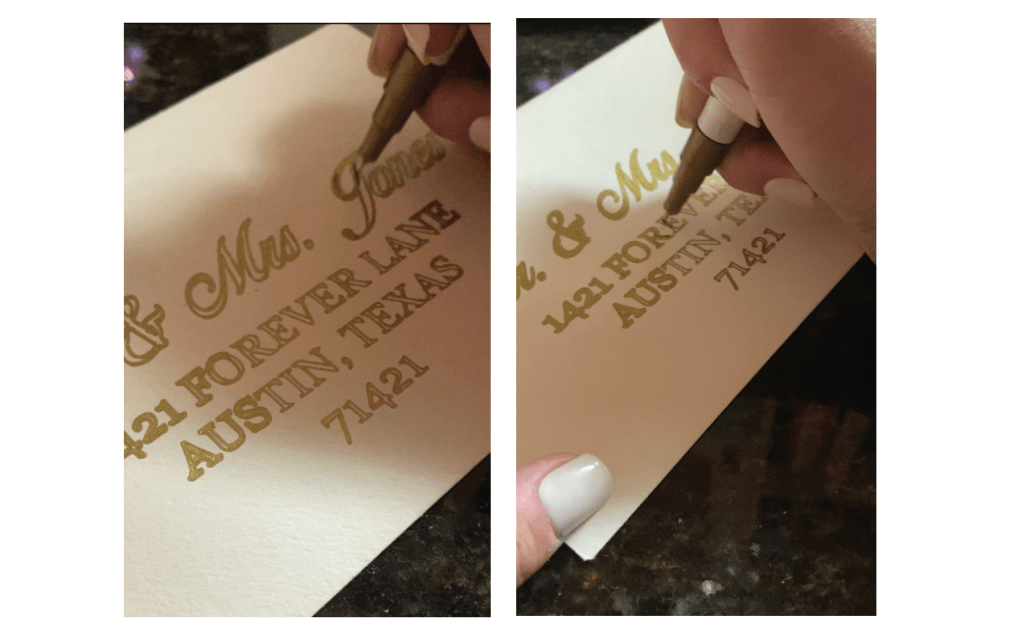
One of the questions people asked was about filling the words. Here is the sad part. Cricut only lets specific fonts from their own software to be done as full fonts and not outlines. So since I used a font from an outside source, it can only be done as an outline ( I know…bummer! ). Once it was printed on the envelope I went and filled any spaces by hand. It may be tedious, but it is super fast and in the end you get a beautiful, professional looking addressed envelope.
And that’s it! My secret is out! I like to think I have good handwriting but nothing like what the Cricut can do! I made close to 80 invitations and it only took me around 4 hours total. Which may seem a lot, but I did them through out a whole weekend and the result were beautiful and loved by many. Plus I saved so much money by doing this!! And that is a win. If any of this doesn’t make sense, I am also adding a video at the bottom. And please message me through my blog if you have any questions 🙂
So thank you Cricut for being the real MVP of my wedding.
P.S. If you see this and want to sponsor me, please don’t hesitate and message me!

Leave a comment